OpenFLUID simulations can be run either using the command line interface (openfluid program), the graphical user interface (openfluid-builder program), or through bindings with external languages and environments such as R using the ROpenFLUID package. All these programs and packages use the same input dataset format (See Format of input datasets), and propose all concepts and features of the OpenFLUID software environment, as they share the unique OpenFLUID software framework.
The OpenFLUID-Builder user interface proposes a graphical environment to prepare, parameterize and execute simulations. It is a good starting point for users who want to discover the OpenFLUID concepts and software environment. It can be run either from the desktop menu of your system or from a console by typing the openfluid-builder command.
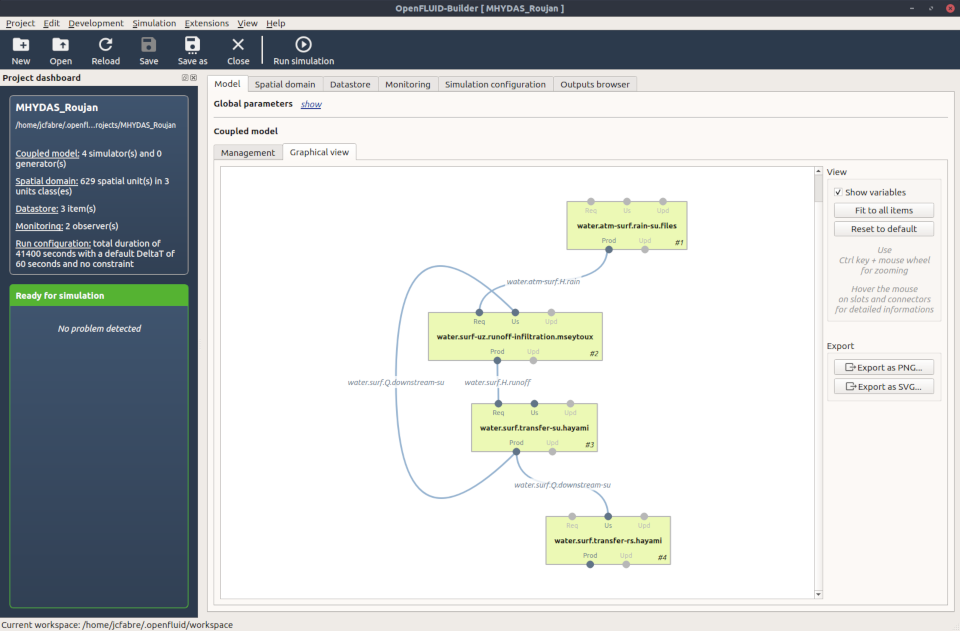
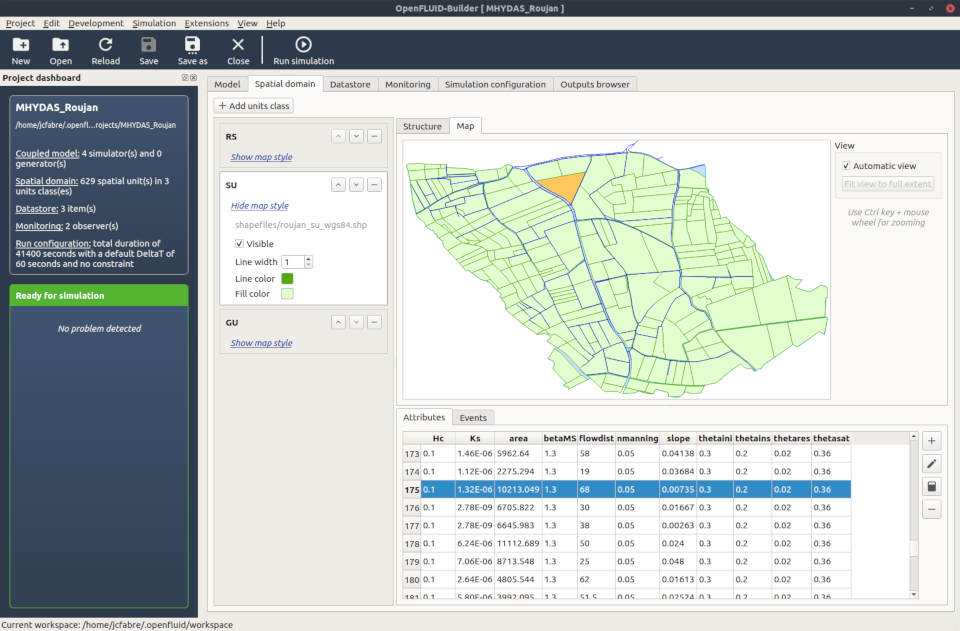
OpenFLUID-Builder functionalities can be extended by Builder-extensions which are graphical plugins for this user interface. By default, OpenFLUID is provided with two Builder-extensions: a graph viewer representing the spatial domain as a connected graph, and a spatial data importer to create a spatial domain from standard GIS data file formats (such as Shapefiles) or from a WFS service (Web Feature Service) available from a local or an internet server.
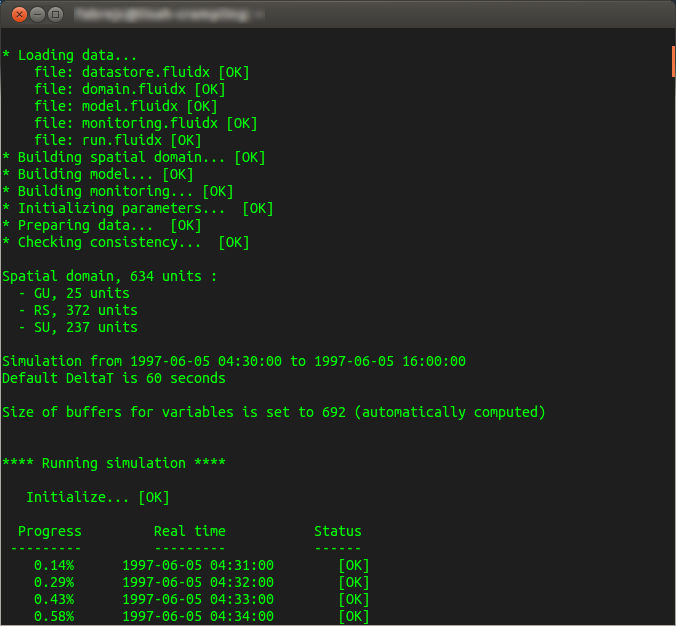
The OpenFLUID command line interface allows to run OpenFLUID simulations from a terminal, using the openfluid program. This usage is particularly useful for running multiple simulations in batch or on compute systems such as compute clusters. To run the simulation, execute the openfluid program with adapted commands and options. You can run a simulation using the run command and giving the input dataset path or the project path and the optional results output path:
When running a project, the results output path is ignored as it is already defined by the project itself. The project must be a valid OpenFLUID project (see Structure of an OpenFLUID project), usually created using the OpenFLUID-Builder user interface. It can also be created manually.
See Command line usage or run openfluid --help to get the list of available commands and options.
OpenFLUID can be used from within the GNU R environment through the ROpenFLUID package. This package allows to load an input dataset, parameterize and run a simulation, then use and process simulation results. It is really useful for taking benefit of all R features and packages for sensitivity analysis, optimization, uncertainty propagation analysis, and more.
Example of a simulation launch in R using the ROpenFLUID package:
More details are available in the dedicated ROpenFLUID documentation, available on the OpenFLUID community site (https://community.openfluid-project.org/).
The OpenFLUID-Devstudio is the part of the software environment dedicated to development of simulators, observers and builder-extensions. It proposes functionnalities for assisted source code creation and development. It can be run either from the desktop menu of your system or from a console by typing the openfluid-devstudio command.
The OpenFLUID-DevStudio environment proposes the following facilities:
More informations about OpenFLUID-Devstudio are available in the Creation of a simulator part.
 1.8.13